Easy Homemade Burger Buns: Forget Flavorless Store-Bought
There’s a secret weapon to elevating your burger game from good to absolutely legendary, and it’s not just about the patty or the toppings. It’s about the foundation: the bun. If you’ve been settling for those sad, squishy, and utterly flavorless store-bought options, prepare for a revelation. Making your own
homemade hamburger buns: soft, delicious, and never squishy is not only incredibly satisfying but also surprisingly easy. Once you experience the pillowy softness, rich flavor, and sturdy structure of a fresh, homemade bun, you'll wonder why you ever compromised.
Many burger enthusiasts share a common dilemma: the elusive perfect bun. Brioche buns, while popular, can often be too sweet, too rich, and too soft, collapsing under the weight of a juicy burger and turning into a soggy mess. If you, like us, prefer a bun that’s less sugary, wonderfully soft but still capable of retaining its shape without squishing into a flatbread, then you're precisely where you need to be. Our guide will empower you to bake perfect
homemade hamburger buns that are truly amazing, transforming every bite into a culinary delight.
Why Homemade Hamburger Buns are a Game-Changer
The difference between a store-bought bun and a freshly baked one is like night and day. It’s not just a subtle upgrade; it's a complete paradigm shift for your burger experience.
- Unmatched Flavor Profile: Forget bland. Homemade buns boast a subtle richness from real butter and milk, with a delicate balance of sweetness that perfectly complements savory burger fillings without overpowering them. The freshness alone makes a world of difference.
- Perfected Texture and Structure: One of the biggest complaints about commercial buns is their tendency to disintegrate or become a soggy sponge. Our homemade hamburger buns are engineered for success. They are pillowy soft to the touch, yet possess an internal structure that stands up to juicy patties, crisp lettuce, and robust sauces, ensuring your burger holds together beautifully from the first bite to the last. No more squished tortillas here!
- Ingredient Control and Purity: When you bake at home, you control every ingredient. This means no artificial preservatives, high-fructose corn syrup, or unidentifiable additives. Just simple, wholesome ingredients you can pronounce, resulting in a cleaner, healthier bun.
- Cost-Effectiveness: Specialty buns can be pricey. Baking your own, especially in batches, is a significantly more economical choice, allowing you to enjoy gourmet quality without the gourmet price tag.
- The Joy of Creation: There’s an unparalleled sense of accomplishment that comes with pulling a tray of golden, perfectly risen buns from your oven. The aroma alone is enough to make mouths water, and serving something you’ve crafted yourself adds an extra layer of love to any meal.
Demystifying the Homemade Burger Bun Process: Easier Than You Think
While the idea of baking bread might seem intimidating, creating
homemade hamburger buns is remarkably straightforward, requiring minimal hands-on time. The process is a delightful blend of simple steps, culminating in an incredibly rewarding result. You might even be able to
bake homemade hamburger buns in 1 hour: yeast to oven guide with a well-tested quick recipe!
Here's a quick overview of the journey from flour to fabulous bun:
- Whip Up the Dough: This is where the magic begins. You'll combine your essential ingredients – flour, yeast, a touch of sugar, milk, and butter – to form a soft, pliable dough. If using a stand mixer, this step is practically effortless.
- First Rise (Bulk Fermentation): Cover your dough and let it rest in a warm place until it has doubled in size. This usually takes around an hour, but keep in mind that room temperature plays a significant role in how quickly your yeast gets to work.
- Punch, Divide, and Shape: Gently punch down the risen dough to release the air. Then, divide it into equal portions. The trick to perfectly shaped homemade hamburger buns isn't rolling between two palms, but rather using one hand to gently cup and rotate the dough on your work surface, creating tension that forms a smooth, taut ball. Once shaped, flatten each ball slightly with your palm.
- Second Rise (Proofing): Cover your shaped buns and allow them to rise again until they've doubled in size. This final rise, often around 45 minutes, is crucial for achieving that airy, soft texture. During this time, it's also wise to preheat your oven.
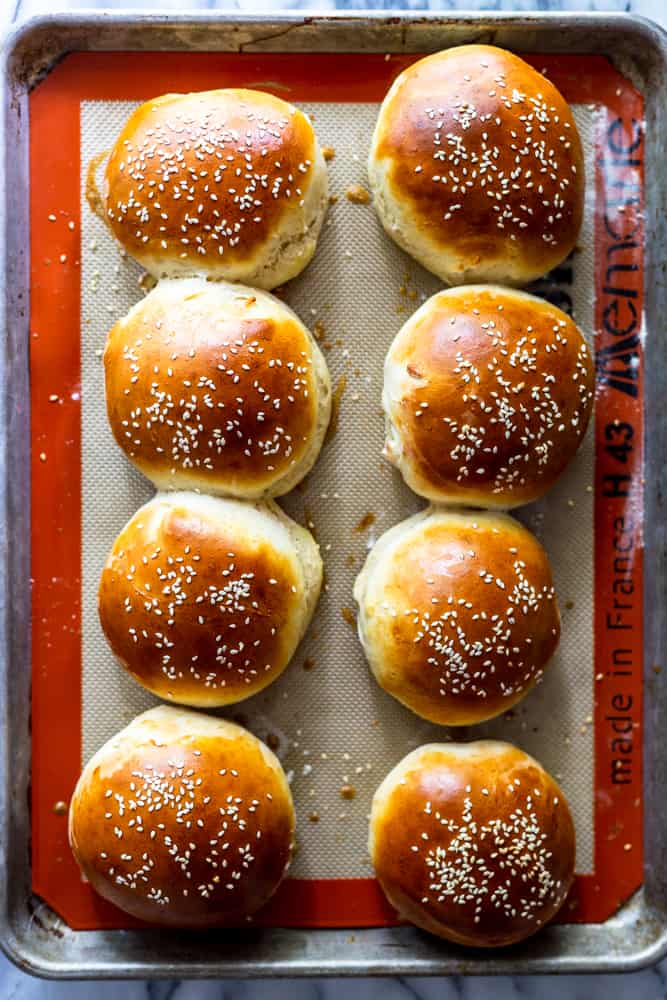
- Egg Wash, Sesame Seeds, and Bake: A quick egg wash gives your buns a beautiful golden sheen, and a sprinkle of sesame seeds adds that classic burger bun finish. Then, into the hot oven they go!
The actual hands-on work, especially with a stand mixer, is often just 10-15 minutes. The rest is patient waiting, allowing the yeast to do its wonders.
Mastering Your Yeast and Proofing for Perfect Buns
The heart of any great bread lies in its yeast and the meticulous process of proofing. Understanding these elements is key to consistent success with your
homemade hamburger buns.
Yeast Management: The Foundation of Fluffiness
- Check for Freshness: Expired yeast is a bun killer. Always ensure your yeast is active. Sachets often offer better freshness, as yeast in opened jars can quickly lose potency. If using jars, store them in the freezer to keep the yeast dormant and extend its shelf life.
- Activation isn't Always Necessary, But Always Smart: Instant dry yeast typically doesn't require activation. However, even with instant yeast, dissolving it in warm liquid (around 105-115°F or 40-46°C) and waiting for it to foam for 5-10 minutes is a foolproof way to confirm its vitality. If it doesn't foam, your yeast is likely dead, and it's best to start with a fresh batch. If you're using active dry yeast, activation is a must.
Proofing Pointers: The Art of the Rise
Proofing is the stage where the dough expands, developing its airy texture. It’s more about observation than strict timing.
- Temperature Matters: Yeast thrives in warmth. A warmer kitchen means a quicker rise, while a cold environment will significantly slow things down. Instead of fixating on the clock, focus on the visual cues and feel of the dough.
- Avoid Overproofing at All Costs: This is a critical mistake that can lead to deflated, dense buns. When dough overproofs, the gluten structure weakens and loses its elasticity. Once baked, these buns will often collapse, resulting in a chewy, doughy, and unappealing texture.
- The Perfect Proof Test: How do you know when your buns are perfectly proofed?
- They should be visibly doubled in size.
- Their surface should appear smooth and slightly shiny.
- When you gently shake the pan, they should have a slight jiggly quality.
- The ultimate test: the "poke test." Gently press your finger into a bun. If it slowly bounces back, leaving a slight indent, it’s ready. If it springs back too quickly, it needs a little more time. If the indent remains without bouncing back at all, it's overproofed.
- Hydration Hints: This dough typically has a moderately high hydration level, around 66%, meaning it will be slightly tacky. Don't be alarmed by a little stickiness. However, if the dough feels excessively sticky, add a tablespoon of flour at a time until it's more manageable. Humidity levels in your environment can affect this, so adjust as needed.
Beyond the Basics: Tips for Next-Level Homemade Buns
Ready to truly master your
homemade hamburger buns? Consider these additional tips:
- Quality Ingredients: Just like with any recipe, the quality of your ingredients matters. Use fresh, whole milk and good quality butter for the best flavor and texture.
- Kneading is Key: Proper kneading develops the gluten, which provides the structure and chewiness of your buns. Whether by hand (expect 10-15 minutes of vigorous kneading) or with a stand mixer (5-8 minutes on medium speed), ensure the dough is smooth and elastic before the first rise.
- Customization Options: Feel free to experiment! Add a sprinkle of garlic powder or dried herbs to the dough, or brush with melted butter and sprinkle with poppy seeds or everything bagel seasoning before baking for different flavor profiles.
- Storage Savvy: Freshly baked buns are best enjoyed the day they're made. However, they can be stored in an airtight container at room temperature for 2-3 days. For longer storage, freeze them once completely cooled. Thaw at room temperature or warm gently in the oven for a "just baked" experience.
Conclusion
Ditching those insipid store-bought options for your own
homemade hamburger buns is one of the most impactful decisions you can make for your burger experience. It’s a simple act of baking that yields profound deliciousness, offering superior flavor, perfect texture, and the immense satisfaction of creating something wonderful from scratch. So, roll up your sleeves, activate that yeast, and prepare to elevate every burger to an unforgettable culinary event. Once you taste the difference, you'll never look back.